
Whether you’re a novice or guitar expert, knowledge in what way to restring your tool can be a supportive skill. Though an electric guitar will want restringing additional often than an audio guitar, restringing a guitar is vital to safeguarding good sound excellence. Beforehand you jam out or show your love a unique song; be certain to retain your strings preserved and in melody.
Restring your Acoustic Guitar
Altering electric or audio guitar strings isn’t a complex job, nonetheless, try substantial a novel guitarist of that. It can appear sufficiently daunting to a novice.
About players are so frightened at the supposed of restringing their instrument that they do not ever study to prepare it and depend on in its place on the home-grown guitar plant to fix it for them. About players are just too indolent to modify their strings, though others don’t even understand that strings essential to be altered!
As a guitarist, perceptive in what way to variation your strings are an indispensable care skill. Guitar strings consume a method of breaking at the greatest ill-timed times, similar throughout a presentation. Knowing in what way to alteration a wrecked string right there immediately is a must. Nonetheless, a wrecked string isn’t the lone aim to alter your strings.
Though old guitars recover with phase, old strings characteristically do not. As guitar strings stage, quality and pitch are damagingly exaggerated by a buildup of grime, perspiration, dead casing, and oils initiate obviously in the fingers.
Strings begin to sound cloudy, turn out to be problematic to play, besides are disposed to breakage. A new established of strings will resolve this. Novel strings have a livelier quality. They break in melody well and are cooler on the fingers.
Formulating to Restring your Guitar
Find an unsoiled and silent room to restring your instrument. Retain the part spotless consequently; you don’t misplace any gears. Likewise, find a silent part; therefore, you can jingle your guitar deprived of having to attend to any circumstantial noise.
Gather your gear. You will want a tuning apparatus, original strings, cable cutters, besides a string winder. Contingent on whether you are a novice or skilled, you might not want a tuning apparatus if you are an experienced performer able to melody tools by ear.
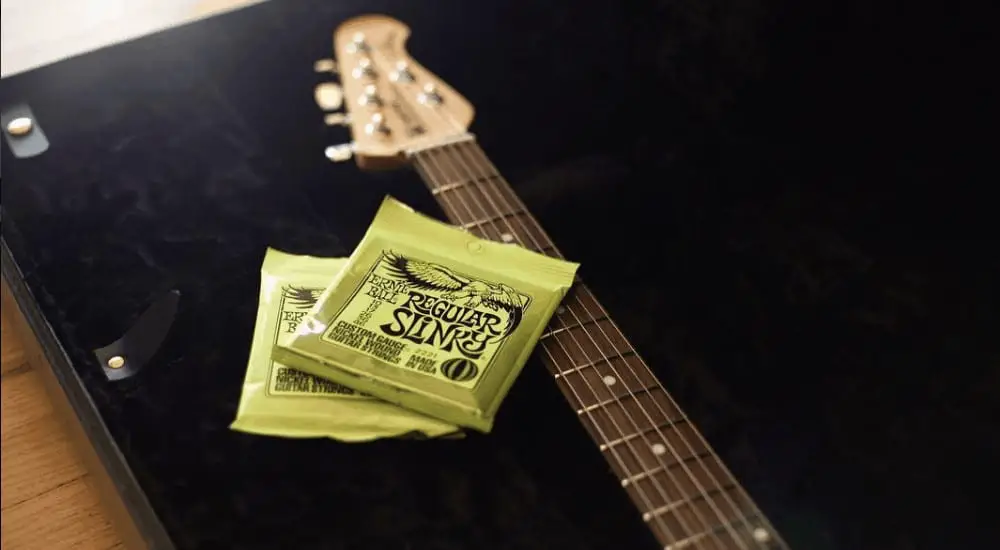
1. Select your guitar strings founded on your taste.
Poise the neck of your instrument. Find somewhat to save the neck of your instrument, such as a special portion of gear you can bargain at a guitar supply. If you are a novice, you can likewise just usage somewhat soft and bent, such as a portion of polystyrene.
2. Remove
Loosen respectively string by as a minimum 5 or so goes, pending they are loose sufficient to not certainly brand a note. At that time, cut the strings about the 12th fret.
Take away the strings from the alteration pegs.
Take away the String Pins utilizing the pattern in your Winder Tool, or limbs, or pliers if you want to.
3. Get rid of the rest of the cords.
If you destitute a string, the sphere on the close of the string might have tumbled into the frame of the guitar, then can be detached by shuddering the guitar around till it falls out the soundhole.
4. Clean the neck
Always take the chance of consuming the strings off to spotless the neck. You should continuously usage Lemon Oil – Rosewood fingerboards juice it in, maple besides ebony panels don’t advantage much from the emollient nonetheless some practice it anyhow, still aids fresh up.
- Untie the tightness of the individual cord with a change key and take away. Try the change key and sense the tightness untie for the respective string. When movable, wind down the string off of the changing pole and get rid of it.
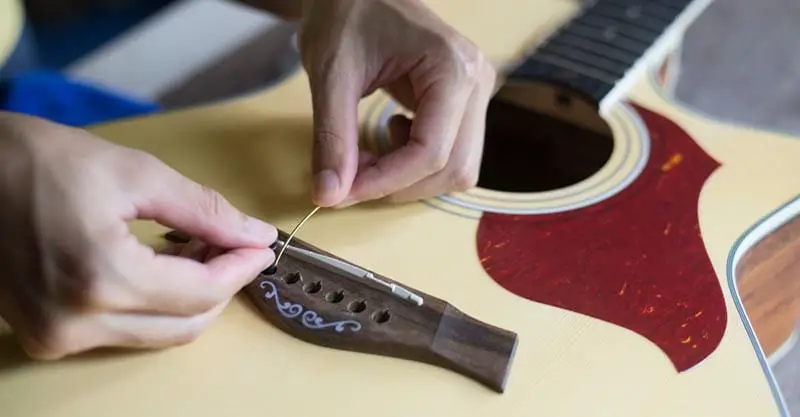
- Take away the bridge jots on or after out of the bridge. Practice the integral nick of the string-winder to eliminate apiece pin. As soon as the jot is out, you can similarly take away the cord after the bridge of the instrument.
- Safe the ball close of the cord in contrast to the base of the bridge to withstand quality. Do not lease the ball close sit on the top of the jot, or it will effort itself moveable.
- Place the cord and bridge jot uneven the 6E bridge hole. Aspect the channel of a bridge pin in the direction of the sound hovel of the guitar and shot the jot into the hole composed with the cord. Concurrently tug on the cord with your other pointer, and as you shove the pin over the hole and into location.
- Take the cord done the change pole and tug. Constrict the cord as you shove it around 3 inches through the change post. The cord must be dragged to the bridge.
- Around 2 inches from the consistent apparatus head, cut the cord consequently that you can jab it complete the apparatus head chute.
- Set-up the cord is utilizing a cord winder. Stiffen the cord employing the cord winder on the suitable change key; nonetheless, don’t look to jingle at present. Just constrict the cord to guarantee you have customary it properly.
- Stiffen the rest of the cords. Frequently, it is finest to stiffen the cords in the direction of 5A, 4D, then 3G, 2B, as well as 1E. Spring your cords to guarantee that they are properly established.
Substitute
Bend each cord and then place the ball conclusion of the cord 10 cm hooked on the hovel and substitute the peg. At that time, gradually tug the cord though keeping some weight on the peg till the cord is tight. Though this might look a slight unconfident, if completed properly, it will be very robust. Look out if the peg looks to be approaching out, just retain pushing it in (fairly tough). Once dragged tight, it must not have any stretch.
Attaching cord to alteration peg
- This share is similar for all kinds of guitars (excluding traditional guitars). The most significant portion of this is receiving the cord on the precise cross of the peg and now is in what method to do it. Primary of all array the hovel in the peg; consequently, it is fronting conventional down the neck. Place the cord concluded the hole and tugged it back; therefore, you have about loose. The sum of limp you want will differ, contingent on the width of the cord. The 6th cord only requires around 5-7cm; nonetheless, the 1st cord can start to 10cm, or around then.
- Here and now, take the live cord and cloak it about the topmost of the peg. For greatest Fender guitars and completely pegs with winders on the left-hand, you place the gale on Righthanded, for the pins through the winders on the right (the 3 fronting the ground on Gibson panache guitars) you’ll gust on this primary wind Anti-Clockwise).
- Now grasp the life (the portion you’ll show) right down to the neck then start twisting the tuner; consequently, the live cord wraps BELOW the dead cord (the loose). This will brand it bolt onto the cord as it gets snugger (it is right for completely the wraps to go below; it is just further protected if you get the bolt).
You must goal for at least three wraps on the 6th cord then 5 wraps for the first cord. More will not be wounded, nonetheless fewer, and the cord might start to slip-up. Attempt not to lease the cord overlap itself, as this might make it calmer to break.
- Jingle your guitar. Greatest novices will need to harmony their cords more than a few times with a change machine. Refer your local tune factory if you are having trouble consuming a change machine.
- Cut any extra cord through wire cutters. The moveable cable can be unsafe and make it hard to show your guitar. Cut any extra cord to guarantee an easy hand drive.
- Guarantee your guitar is at a steady location. Practice guitar care for the neck of your instrument as you place it on a level and hard exterior. If you do not have a guitar provision, put the neck firmly against your trunk as you wind down the cords.
- Usage cable cutters to cut the cords. Make some loose and cut the cords moreover by the midpoint of the figure of your instrument or by the neck unplanned. When cut, take away the cord.
Make certain you do not drop the instrument.
- Take the fresh cord and put it concluded the guitar. In a Gibson panache guitar, take the novel cord concluded the tailpiece that is beneath the form. For a non-fastening Fender-style, strand the new cord hooked on the tremolo hollow.
- Brand the hole in the pole line up with the neck. Employing the change key, try the hole in the pole vertical to the neck of your instrument.
- Stiffen the cord 3 inches after the bridge. As you tug the cord, amount about 3 inches of loose to permit for twisting. Keeping your skim on the other adjacent of the hole, halt easing the cord through the pole when it hits your finger.
- Screw the cord in an S shape. Usage one hand overhead the pole and the further underneath it to screw an S about the post. Easily screw the cord in a righthanded gesture.
Wind in the differing course for high cords on 3 + 3 headstocks.
- Slide the cord amid the nut then the post. Stole the portion of the cord that’s previously concluded the post, about the pole and amid the extra cord amid the nut and the post. In other arguments, yield the top share of the S then try it into a P besides place; it concluded the lowest portion of the S.
- Make a ring and crease. Ring the 2 ends of the cord, crease, and stiffen near the upper of the headstock. Stiffen and bolt the cord into place with this method.
- Practice your thumb to lock the inferior portion of the cord and stiffen. Take a cord winder and locate it on the change key. Try righthanded and, just underneath the pole, usage your thumb to sense the cord get taught.
- Give the cords as you jingle. Do this procedure as required. Usage the fifth fret to begin this course. Tug the cord up with 1 hand then change up the fretboard with the extra. Rearrange the extra frets.
- The cord will bounce as you stretch. Recurrence the procedure until the cord no longer slipups.
- Take away extra cord with cable cutters once you are content with the widening.
Stretching In
Finally, and fairly frequently gone, is to spring the cord in. Just mildly tug on the cord with your right hand, utilizing your left hand to grasp the cord in its precise location in the nut. You must see it going out of melody significantly, and will necessity to melody it over. Endure widening till you no longer want to jingle it up, and you are prepared to rock!
When to alter your cords
Consequently, in what way frequently should you alter your cords? Well, the response differs from one guitarist to another guitarist. A specialized who plays each day will perhaps change their cords every 3 or 4 shows. Guitarists who moisture a great deal, or play in misty clubs, or devote hours a day singing, particularly playing belligerently, will need to alteration their cords more frequently than a player who does not.
If you consent your instrument out of the case, even issues such as moisture and contact will bother away at the cords and require more recurrent variations.
Instead, someone who sings less often might be able to drive longer amid cord variations, particularly if they frequently unsoiled the oil and grime from their cords after playing.
One preceding thing to reflect when speaking about in what way frequently to change cords is player favorite. Some bands prefer the sound of their ancient broken-in cords, though others desire the sound of making remarkable novel ones. Eventually, knowledge will tell you once to alter cords long beforehand a cord break.
Some indications that a restringing is acceptable will be if you begin to take a harder period than normal receiving the guitar in a melody (though this isn’t continuously revealing of old cords. Change matters could likewise point to complications with the gadget itself.)